
You will need spotting dyes. There are a few companies that still manufacture them, and you can try them and see if they work for your purposes. Good dyes will soak into the emulsion and leave no trace of residue on the surface of the print. They will also mix easily to make new, intermediate shades. Test any new dyes with at least those two ideas in mind. As traditional silver-based imaging becomes less common, so do the manufacturers of the necessary tools. Keep an eye on places like Ebay for dye colors that aren’t currently being made. I’d have no problem buying a used bottle of dye since they last forever, and some of the older dyes are actually better than the newer versions. My favorite brand is Marshall’s retouching dyes, and to get a full set, you may need to look around a bit, but it shouldn’t be impossible.
This shows a few of the most common dye colors I use frequently.
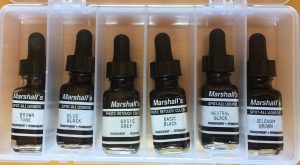
This is what I would consider a complete set of Marshall’s Photo Retouching colors:
Basic Grey
Basic Black
Neutral Black
Blue Black
Brown Tone
Selenium Brown
Olive Tone
Bright Orange
The first place to start on your quest for a set of dyes should probably be B&H Photo in New York. They have a starting set that you can add to as you find missing colors.
If you happened across an old set of Spotone Dyes, a reasonable starting set would include:
#1, Blue Black
#3, Neutral Black
B, Brown Tone
S, Sepia Tone
O, Olive Tone
They work just fine, although, out of the bottle they are not as concentrated as the Marshall’s. If you need a darker shade than the straight liquid will produce, just smear a little on your plate and let it dry. When you then wet it again with a tiny amount of distilled water, it will be as concentrated as you could need.